Showing posts with label Instant Cameras. Show all posts

Film Hacking: Not Your Typical Polaroid

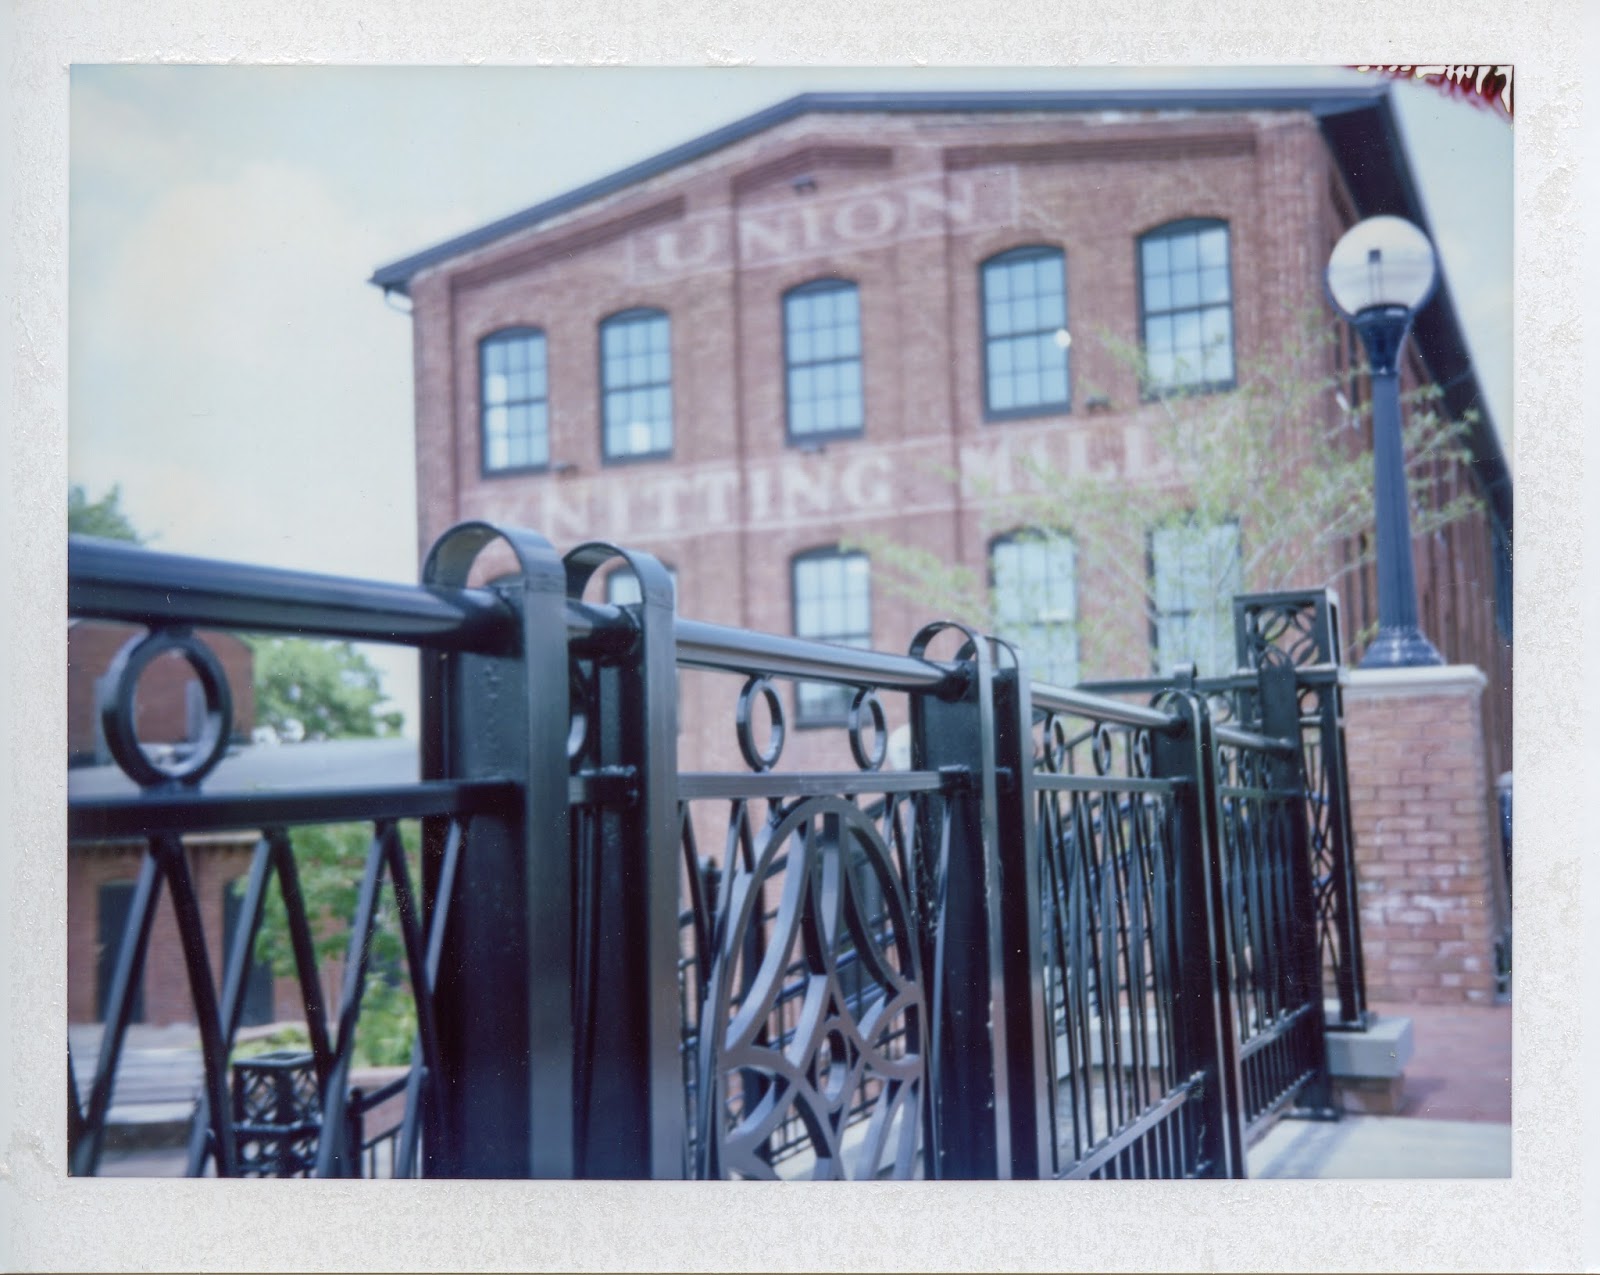
A number of months ago, I snapped a photo on Fuji FP-100C Instant Peel Apart Film, and was particularly pleased with the results that I obtained.  


Would you care to guess which camera model shot the photo?


Might it be the Polaroid 100?  The original article, that I have recently acquired?

Perhaps it is the Polaroid 360, a well equipped model complete with Zeiss finder, that I've also recently picked up?

There's also the possibility of the responsible camera being the 440 model, that I recently was less than elated with.

It could also be the Colorpack II model, the first peel apart Polaroid model I tried, which became an unexpected favorite to me.

Or might I have found a way to finally adapt my otherwise obsolete J66 model that uses roll film to be able to use pack film instead?

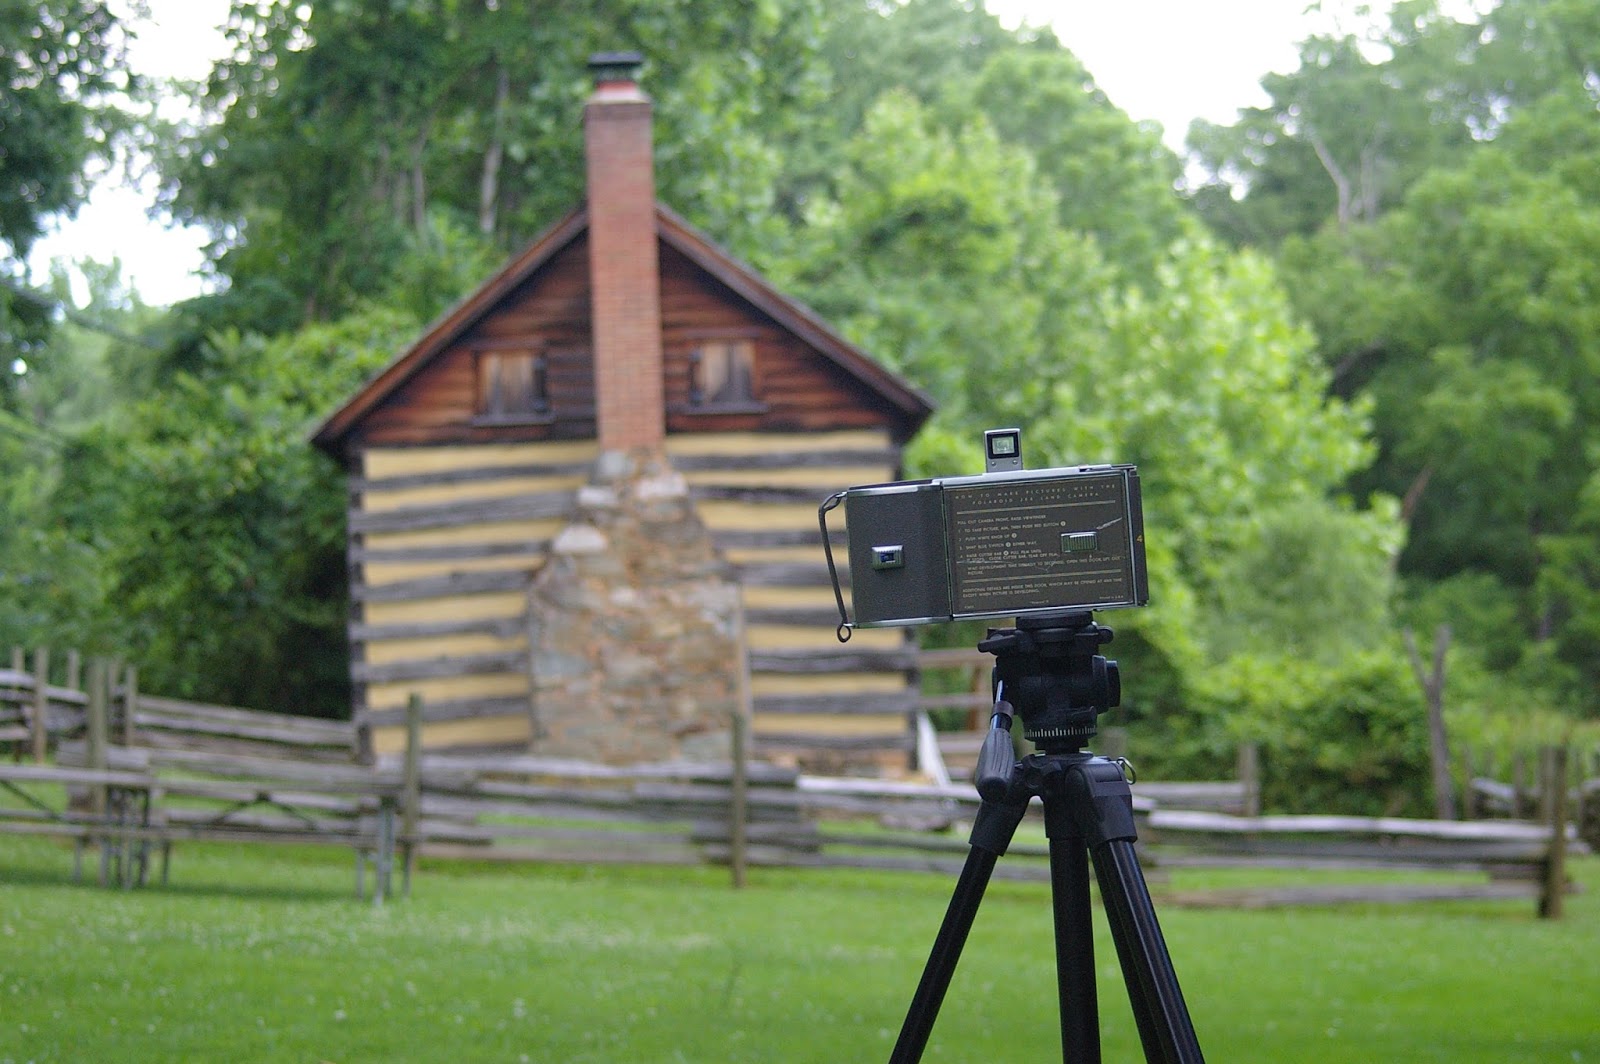
Well, none of these answers are correct, though the last one is the closest to being correct. Here is the camera that shot the above photo...


This is a Kodak Brownie 2C, a model that looks like the typical 116 or 120 format box camera, but this model is designed to use 130 size film.  I picked it up at a nearby antique store for under $20, if only to round out my box camera collection that already had examples in 116, 120, 124, 125, and 127 formats.  It was clean and solid, and had a healthy working shutter.  

But then there was the matter of film, which had been discontinued in 1961.  Typically I'd do as I'd done on some other cameras using discontinued film formats, and either find a roll of the film on ebay and after first use, recycle the backing paper with 120 film stock taped on.

However, the 130 format film that I was spotting wasn't exactly cheap.  It was actually costlier than the camera itself, so I improvised and taped a pair of 120 backing papers together to create a 2 7/8" wide backing with handwritten numbers.  This was something that worked only so well given the challenges of keeping the papers parallel and slack free.  I then took a roll of Orwo NP15 in 120 format and taped it upon this impromptu backing paper, and tried some test shots.


A pair of shots of 120 Orwo NP-15 film placed onto a homemade 130 backing showed me not only that this film had encountered a hard life before I got it, but also that the Kodak 2C Brownie is a decent camera! 


The results were dreary (and certainly aged in appearance) to say the least, but this was more due to the extreme fogging present in the 1980's Orwo film stock.  Looking at the details of the photos that I could make out, I was actually pretty impressed with the details evident from the simple lens.   I certainly wanted to try this camera again, but before grafting another roll of 120 stock onto my homemade 130 backing, my curiosity got the best of me.

I had previously loaded up the aforementioned Polaroid 360 with a fresh pack of Fuji FP-100C, and upon taking the first shot, experienced a jam in the camera that simply would not clear.  Apparently this is a common issue due to the pressure of this camera's electronic timer mechanism.  The issue typically occurs with the first 2 or 3 shots in a pack before clearing up.  As I cleared the jammed exposure from the film pack in the dark, a light bulb went off.  Fortunately that light bulb was in my head so it did not fog the film. 

Taking the jammed exposure and examining it, I was able to see that with a bit of maneuvering, it fit PERFECTLY in the film area of the Kodak 2C.  Since I wanted to clear a few more exposures from the FP-100C film pack to be able to use it readily in the Polaroid 360, I elected to pull another shot from the pack and carefully lay it with the negative facing the lens of the 2C.  I then lightly placed a cut piece of black card stock over the whole arrangement (to both block light from the red window on the back of the camera and to help keep the film negative flat. I then reassembled the camera.  All of this was done IN DARKNESS.


A cross section of how one shoots a piece of pack film in a Kodak 2C Brownie.  The camera's dimensions fit perfectly around the carefully folded piece of unexposed pack film, negative facing toward the lens. 

With the lights now able to be turned on, I headed out and found a sunny scene to test my experiment,.  Following the exposure, I came home and went back to my dark room.  With the lights out, I carefully disassembled the camera and removed the film, taking care to then realign the packet so that the exposed negative could be pulled through my Colorpack II camera and transfer the image from the negative to the paper. 

The results are what you see at the top of the page.  I was elated with the results, being a vast improvement from my ill fated first roll from the Orwo film.  I actually found myself dipping into the film pack a few more times to recreate this experiment, some samples of which are seen below.  While I hit a few technical stumbles on the way, particularly with getting good film pulls through the spreader bars of the Colorpack camera, I was still quite pleased with what was coming forth through the lens of the old Kodak Brownie 2C.

One challenge of going out for a drive in new territory with one sheet of film in your camera that you can't swap out until returning home is finding the ideal chance to use it. A trip west through Boonsboro revealed this old lime kiln that seemed as good a photo op as any.  Note the crimp in the paper at left top indicating an issue with the pull, as well as a blur and light leak on either side of the center. 


Exposure controls on the Brownie 2C are pretty basic, but are there, but you must remember to use them!  On a separate day from the photo above, I drove for a while and finally elected to snap this farm scene, hastily stopping on the shoulder and hustling up a hill for the quick snap, only to realize AFTER I fired the shutter that I hadn't used the aperture setting I wanted on this bright day.  Despite some over exposure, the result still looks nice! 

Just as 130 film vanished over 50 years, time is running scarce to use fresh FP-100C in a Kodak 2C, given its discontinuance by Fuji.  And while this sort of experimentation isn't for everyone, for the film hackers out there like myself who enjoy getting recorded images from long dormant lenses, this little improvisation works amazingly well for the time being. And what to do for the longer term?!?  Well there is always Instax Wide!


A pair of exposures in the Kodak Brownie 2C using Instax Wide film.  Using polarizing filters and the diaphragm to tame the Instax film speed, I was able to get some promising results that got my curious mind wandering again.  In the shot below, I used the "Close Up Lens #1" over the lens of the Brownie, just as I did with 120 film a few weeks ago, to create a close focused image through the box camera. 


This experiment served to me as a really great example of a win-win.  Not only was I able to bring new life into this 130 film format camera to see that it was capable of quite a lot more than anyone might expect, but it also opened my eyes into doing more experimental things with different instant film media, eventually resulting in my own fun little breakthrough only days later that will be shared shortly!  Stay tuned! 

Trying to Get Instant Kicks: The Polaroid J66

Stubbornness is considered an inherited trait, and is one to which I can readily admit having. I show it at work and in my family life, but my stubbornness is pervasive enough to affect my hobby as well. Where most sane people in the hobby of film photography would not bother with trying to get an image from a piece of equipment that is functionally obsolete, I push forward with a "Can-Do" spirit that is admittedly a bit over the top at times...

To the point where I have to wonder when I should stop beating a dead horse.

The tale begins in the height of my Polaroid pack film enthusiasm.  Still psyched to have a new toy to play with in the form of the Colorpack II, while preparing to purchase yet another in the form of the Polaroid 440 from Strawberry Fields, I'm somewhat intrigued by the sight of another interesting Polaroid camera sitting before me pleading me to add it to my collection.  It's called the Polaroid J66.


Knowing nothing whatsoever about this camera, with just 15 minutes on the meter outside, and my youngest son sitting on my neck as I sweat in the small store trying to keep him from breaking any of the multitude of interesting items, I take a quick look online, and without finding much in the way of information, elect to just simply toss it into my purchase for good measure.

It is only after I get home and do the proper Polaroid research that I should have done initially, that I discover that the the 1961 vintage J66 has long been a camera for which a suitable film has not been made.  Armed with a selenium meter and designed for 3000 speed film, with only a rather non-descript dial to adjust exposure, this model took Polaroid roll film Type 47, discontinued about 25 years ago.  I had a rather interesting looking white elephant on my hands, but one that seemed to at least be functional to some degree. 

Ever the curious type, I thought it might be interesting to see what might be possible with this camera. I was able to find articles of converting this camera to use pack film, and another showing how 120 film could be adapted for use in Polaroid roll film cameras, but both possibilities involved a bit more legwork than I wanted to do with this basic camera.  I wondered if there was a way that I could "try" pack film in this camera on a one-off basis. 

I wouldn't have to wait long to find out.  Only a few weeks had elapsed when I encountered a film jam in a pack film type camera.  My only recourse was to open the camera in the dark to dislodge the jam.  Once I figured out how the film sheets and their paper were interleaved into the film pack, I elected to sneak one out and see if I could carefully lay it inside of the J66 in the dark, so as to expose the film.  Developing it would then be a matter of reopening the J66 in the dark and properly pulling the whole arrangement though the spreader bars of my empty Color Pack.  It seemed like a low-risk, low-effort, and low-cost way to try to get a final hurrah from this camera that had likely taken its last photo at least 30 years ago.  

In darkness, I laid the film into the camera with its bellows extended, and carefully closed it up, taking care not to close it back up for fear of fouling the film plane alignment when reopened.  With kids in tow, I set off on an errand, making a quick stop for a photo at the old Braddock Heights trolley station.  With clouds playing touch and go with the sunshine, I opened the basic aperture of the lens as far as it could go on a lightly overcast scene and fired away, and then hustled back home to see my results. The big trade-off to shooting this camera in this manner is that the "instant" part of the equation goes bye-bye.

Later, I headed back into the dark confines of the basement to extract the exposure, thread it through the Colorpack's spreader bars and see what I had before me...


In a nutshell, I had a greatly underexposed photo, AND I made the huge mistake of leaving the numbered pull tab attached to the "packet" as I pulled it through, resulting in the yellow impression on the left side of the frame.  Despite all of these flaws, I felt as though I had accomplished a lot.  I was also surprised by seeing that I actually had a sharp image before me.  It appears as if my attempts to preserve the proper distance between lens and film plane were actually successful.

I could have stopped there, but why?  I had found this experiment fun and innovative, and had some lessons learned that would allow me to perfect my results.  As the same film pack of FP-100C wound down to its last exposures, I thought it would be far more fun and rewarding to get some results from the J66 using some tweaks.

My first thought was obviously to remove the small numbered pull tab to avoid the discoloration patch in the result, but given the decent color in the brightly lit sky on my first try, I figured I simply needed to wait for a very brightly lit day and try another exposure wide open to give this J66 a more fitting result.  A few days later, I got the chance to stop at a nearby pond that was streaming in vast amount of sunshine and confidently fired away to later get this result. 


Yet again, this camera delivered very underexposed results.  Either the meter was shortening the shutter speed in the bright light, or there simply wasn't enough speed in the lens to record a suitable image in the brightest of light.  Greatly deterred, I retired to give this whole folly further consideration, before arriving at what seemed to be a epiphany of sorts.

With the piece of pack film in the Polaroid, I could make multiple exposures of the same scene as much as I wanted.  The J66 came conveniently equipped with a tripod socket, so the solution was to outsmart this camera, mount it upon a tripod, and take a number of shots (likely 4) of the same scene repeatedly.  It seemed I had the found the secret formula to successfully yielding a decent image from the J66.

After work one afternoon, I stopped past one of my favorite scenes along my varied commute path, the Oakley Cabin.  Of course, the instant I pulled up to the scene, the sun vanished behind a large ominous cloud, allowing, or rather dictating a 15 minute wait before what I expected would be a successful third try at injecting life into the massive old camera.  


As the cloud finally gave way, I discovered the scene was partially obscured in shadow and stopped down the lens a little bit (to improve sharpness) and fired off 8 exposures of the scene, worried that I was being a bit too generous with my counter-measure, only to get the following result.  


My increasing anxiety in this project becoming more evident in the poor quality of my pulls, I was starting to get daunted.  What was an impromptu $2.50 experiment was now costing a bit more in my time and energy, and still wasn't yielding better results.  If anything, the original "shot in the dark" approach of my first try was the best result of them all, save for my failure to remove the pull tab. The refinements to my technique were yielding me nothing.

As I opened a pack of FP-100 Silk to load into the jam-prone camera that started this mess to begin with, I elected to give it one more try, since removing a sheet would presumably help alleviate the pressure that often causes such jams.  My thought was to improve upon my previous effort by boosting the number of exposures to 12, and ensuring the scene I was shooting had ample sun light, something lacking in the shot of the Oakley Cabin.

Preparing to leave Hagerstown City Park, I quickly attempted to finally get the results I wanted in a scene of the lake well lit in early afternoon summer sun.  I fired off 14 exposures in total, and wondered what I'd see in my results.  Instead of pulling the film through the spreader bars, I fed it through the extraction mechanism of a model with rollers to get the following result. 


The "pull quality" of this exposure hit a new low, not producing an even rectangle, but rather an awkward shape resembling the state of Ohio.  Exposure wise, there is improvement in the light areas, but still a LOT of darkness in areas that were amply lit.  This could be a typical result for peel-apart film which traditionally struggles with contrasty scenes. 

Still, it's a challenge when 14 shots on the same piece of film still shows underexposure in even the brightest parts of the image.  I wondered if some form of reciprocity failure was bedeviling my efforts to burn in the image as the film lost sensitivity to light with each successive exposure.  

So after 4 tries of trying to give the J66 the dignity of going out on a good note, I'm taking a break.  Perhaps I'll find the resolve (or stubbornness rather) to continue in this endeavor at some point, but my supply of pack film is rather limited, and its use is perhaps best spent on exposures that will net a better success ratio than this.  

I'm stubborn as a mule, but the Polaroid J66 is stubborn as an ox. 

An Instant Repeat: The Polaroid 440

When it rains, it pours.  I had not even cleaned the dust from my Polaroid Colorpack II camera before I had elected to look about to see what other models I might be able to find, stopping in one of my favorite shops in Baltimore known for carrying some affordable collectable cameras, when I spotted a folding type model among the offerings for a mere $12! I was now the owner of a second Polaroid pack film camera - a model 440! 

Plastic fantastic?  The Polaroid 440 isn't on the very top of the list of desirable Polaroid models, but finishes strong with its glass lens and adjustable aperture.

My enthusiasm for the Colorpack was still quite strong, but given that I was in the area, and knew this store was one of the best in which to find such a thing, it made complete sense to grab this while my logistics allowed, so as to give a try to a model with a touch more in the way of user features and adjustability.  Admittedly, I hadn't quite vetted the 440 in relation to other models in the pack film line up, but it looked to offer a decent bit of features.  I had no idea of its functionality, but if worse came to worse, it would make an interesting display piece.


Looking over the 440 model, I was enthused to notice the flip up viewfinder with rangefinder for focusing, an ability to "stop down" the lens for bright settings, and a somewhat more portable profile than its sibling, at least when folded down.  My enthusiasm began to wane a bit when I opened up the battery compartment to discover a Mallory cell that had likely been sitting inside for the better part of three decades and had both seeped as well as fused to one of the battery contacts.  Fortunately, I was able to isolate the contacts, and an evening soaking them in a shot glass with white vinegar cleaned them of any leeched acid.

Even with this resolved, the battery feature of this 440 model spotlighted what was, and would continue to be, a sore spot with this model compared to the Colorpack II.  It used a 3 volt cell that was not commonly found today.  However, with some adaptation, and a strong rubber band, many users of Polaroid cameras using 3V batteries reported luck with adapting them to use CR-123 cells.  I certainly had a decent supply of these, but my attempts to use the "rubber band trick" only met with frustration, and me stripping the contact from its wire.

My "solution" would be to tape the frayed wire to the negative terminal, and open the battery chamber before each shot to press the positive terminal to the post.  This worked most of the time, but not always, as it was easy to slip and lose contact.  Unfortunately, in the two instances where it didn't work, I could sort of detect this based on the quick nature of the click when the shutter was released, but I neglected to think this through fully.  Without the battery power, the shutter simply didn't operate as intended.  All I had to do was to STOP, reseat my fingers on the battery posts, and try again BEFORE pulling the film exposure from the camera.  Instead, I pulled the shot from the camera, and unveiled a perfect black rectangle.  Artful perhaps in its own way, but not the wisest use of $2.50.


The cadre of controls at a glance or two.  Above, a film speed dial and a lever to stop down the lens in accordance with conditions, as well as a lighten/darken dial similar to the Colorpack.  Below, one can see an indicator to show which aperture setting is selected above the lens, as well as two push buttons that move the struts as well as adjust the rangefinder.  The red button is the shutter released, depressed after pulling down the cocking lever seen in the top photo. 


Even setting the battery issue, and my slightly odd method of rectifying it aside, I found using the 440 a bit more of a hassle than the Colorpack II.  Much of this stems from the fact that I'm a reasonably good estimator of distances, and while the Colorpack's lens was encircled by a distance scale, the 440 employed a rather simple unit-focusing design in which either of a pair of "buttons" were pushed inward to achieve focus by registering dual images of the subject in the small rangefinder (which moved the struts to change the distance between lens and film) before moving to the viewfinder to fully compose and shoot the image.  

While this wasn't a huge hassle, and would presumably help reduce the possibility of distance estimation error on my part, it was accompanied by the need to manually cock the shutter before each shot, which I often forgot.  Combining this with the particularities I was following to ensure power was flowing to the circuitry often resulted in a comedy of errors in which I focused, made my efforts to establish battery contact, composed, and fired the shutter release only to realize I hadn't cocked the shutter, requiring me to redo several steps.  

The shutter on the Colorpack II didn't require manual cocking, making for a bit more fluid of an experience to me, helped in large part by its compatibility with common batteries.  From a usage perspective, I was actually a bit more appreciative of the experience using the "lowly" Colorpack than this more upscale model. 


The two part viewfinder, with a small, but very clear rangefinder, whose patch can be seen below.  As I would come to discover, framing accurately in the viewfinder was a little more challenging than expected when I wanted to crop elements out of a scene. 


Still, despite my belly-aching about its rather roundabout ways, I was quite glad to be able to shoot the 440, expecting better things from its known glass lens (I'm not sure if my Colorpack is one with the glass lens or the plastic lens) and the ability to pinpoint focus using the rangefinder.  In addition, the ability to stop down the lens in bright light using the sliding lever below the lens board would theoretically allow for even sharper images to really maximize the return on my $12 investment.

As well, the 440 has a slightly faster lens (f/8.8 vs f/9.2) than the Colorpack, and a difference in features that does not even factor in with "conventional" film photography.  Cost containment in the Colorpack model left Polaroid to use "spreader bars" instead of rollers as the means of "breaking" the developing pack and spreading the developing chemicals across the film.  Both methods did the job, but the prevailing thought would be that the (more expensive to produce) rollers would do a better job of spreading this evenly across the surface.  

As I came to discover, none of my shots using the 440 had the undeveloped corners that some of my shots in the Colorpack exhibited.  I can attribute this to the even coating that the rollers provided. However, I did find that the exposures taken on the 440 came out of the camera far more easily than those from the Colorpack - perhaps TOO easily.  Most resources recommend a slow but steady removal of the shot from the camera, but I found it tough to gradually remove the shots from the model 440. 


My improvised solution to power the camera consisted of tape and a savvy squeeze of a CR-123 cell between the contacts of the model 440. 

While using the 440 was generally a bit more involved than the more simplistic Colorpack, it was still an enjoyable experience, in spite of the hiccups with the battery and the shutter cocking.  I was quite impressed at how Polaroid was able to make a "modern" bellows camera during the 1960's and 1970's that still works quite well today, at least as long as one can acquire the endangered film for it. Just as with the Colorpack, I looked forward once again to each and every shot taken with the 440, and sought to push it to its limits as much as I could.  In one instance, it actually FAR exceeded its stated limits, leaving me nothing short of amazed, even if other limitations made this capability a bit of a challenge to use. 

My "second" Polaroid journey follows, with a bit of intertwining with my first! 

An "artistic" baby blue bracket to the left?  Nah, this was the result of improper film loading that I hastily corrected in the light.  The fanned pull tabs didn't pop into the proper door requiring some adjustment on the fly.  Regrettably, the left edge of this photo was what I was attempting to focus upon.


Technical goblins remedied, I set out to do a comparison shot with the Colorpack.  Though the composition isn't exactly the same, the focusing point is.  Though this result is good as well, I'm actually a bit more partial to the sharpness I see in the shot from the Colorpack versus the 440.


An increasingly common "test" of mine is to focus at the nearest focusing distance to test it as well as to sample the out of focus rendering.  The 440 does well on both accounts with this one, though I begin to notice some funny coloration in the sky areas. 


By my next shot, however, I'd begun to notice a few more undesired results from the 440.  I traipsed into a community farm space and focused upon the right headlight to snag this image and had very high hopes for it, only to be disappointed.  Image sharpness is lacking, perhaps from some motion blur, and the infusion of red color into the sky is very noticeable, as well as the dark area to the right.  In addition, I recall composing this image to where the tractor took up more of the frame, while the modern apartments were not in the viewfinder. 


This closer focused image under an overcast sky came out more or less as I'd hoped it would.  But again, I'd composed it to where the left edge of the gate iron was aligned with the left edge of the frame.  I now know that the lens sees more than the viewfinder does. 


According to most resources, the maximum shutter speed of most of the Polaroid pack film models is an impressive 10 seconds.  So imagine my surprise to squeeze the shutter open and discover it held open for about 30 seconds for this image, before I finally relented and let go to avoid overexposure.  The result is surprisingly nice, but admittedly marred by a missing feature in all plastic bodied Polaroid pack film cameras like the 440 - a tripod mount.  The camera was merely resting on a wall. 


This is what happens when a Polaroid pack film camera isn't getting power.  Though most of my shots worked with my improvisation, this was not one of them.  I call this one "Midnight under a New Moon." Coming soon to my Artistic Gallery! ;)


Last shot for my inaugural cartridge on the 440 was this image of a particularly period specific subject.  Again, I'm a bit disappointed at the results from this shot, not really detecting the sharpness that I'd hoped, while dismayed at the magenta hue invading the overall scene. I did take care to FILL the viewfinder frame with the car to get an idea of how much more the lens sees in comparison to it.

Had the Polaroid 440 been my first model of this genre, I'd have certainly liked it.  However, having used this camera after using the Colorpack, and comparing the results, it is very clear to me which of these two cameras will next see a pack of film, and it's not this one.  I don't know if this camera's seeming issues with image sharpness as well as its spreading of chemistry via the rollers are an anomaly or not, but I find that I generally prefer the look of the snappy results on the more basic camera model to the somewhat indistinct and poorly colored results from this mid-grade model.   That the usage of the Colorpack is appreciably easier than the 440 is an particularly nice bonus that only furthers it as the preferred model of the two for me. 

Will this have been my sole experiment with the 440?  I can't say for certain.  Unfortunately, pack film is in limited supply and isn't exactly a cheap thrill.  I didn't see anything in particular from this set of photos that I don't feel I could have replicated with the Colorpack.  Yes, the rangefinder makes focusing a bit more precise, but given that I wasn't seeing the sharpness in those subjects anyway, I once again couldn't see myself turning to use the model 440 again. 

I will keep my eyes open for a similar 100-400 series model Polaroid in the near future that I can snap up at a modest cost, but even if one doesn't materialize, I'm happy to have the Colorpack as a good user Polaroid, in spite of its bulk.  With that in mind, and with 2 more packs of film in my employ, I can certainly say that I'm hardly finished shooting this new-found medium!  

Late to the (Polaroid) Party: The Colorpack II

I'm not necessarily known as being an "early adopter" among consumers.  I barely have 3 Blu-ray discs in my collection, don't fully know how to use my Play Station 3, and plunk away on computers made before Barack Obama took office.  I'm hardly one who is ahead of the technological curve any more.

And then there is my penchant for film cameras.  While I'm sure Kodak, Fuji, and Ilford are glad to have my film related business, I'd imagine the folks at Canon, Nikon, Sony, or Olympus might be disappointed that I'm not quite the gear head who must upgrade to the newest models of their hardware each year.

And yet, even within my odd niche, I can be well behind the curve as well.  In this case, it has led me to barely grab hold of the irons as the last train is leaving the station, and joining in the final passage of a journey that many in my hobby reflect upon with nostalgic sorrow, but for which I've been more or less blissfully unaware until just recently.

The story begins as I'm perusing some Craigslist ads only to stumble across one particularly interesting listing selling off a collection of various cameras and lenses.  The lot includes some new pickups from familiar makers like Nikon and Pentax, a few classic roll film models, and a pair of extras tossed in from a name familiar to nearly anyone who has even seen a physical photo taken in the last 50 years: Polaroid.

Ask the average non-camera collecting person about what Carl Zeiss, Voightlander, or Leica means to them and you are likely to be met with a blank stare, but chances are that same person should have a pretty decent idea about what a Polaroid entails, From its decades of innovation as a leader in the field of instant photography, the term "Polaroid" has largely come be synonymous with its genre.

At the same time, the term Polaroid has largely become synonymous with the term "Hipster," One need only review the lyrics to Demi Lovato's "Really Don't Care" to get the vibe of recent sentiment towards the caricature of those who partake in instant photography. Things certainly have changed in the decade plus where Outkast once popularized the phrase to "Shake it like a Polaroid."

So when this one camera fell into my lap with this single Craigslist transaction, I was excited, dismayed, and confused all at the same time.  You see, while I can not only find meaning to the names Carl Zeiss, Voightlander, and Leica, I also have a decent grasp of the history of these camera makers to have a basic idea of their product lines through the ages. Not so for Polaroid.

And to think that at one point, I was an enthusiastic user of one of their products: Polapan film, a really wonderful 35mm black and white slide film from the 80's and 90's that was "instantly" processed in a small crank-spun home processing unit to yield some lovely monochrome transparencies.  My enthusiasm for this product never once spilled over to me wanting to adopt any of Polaroid's "bread and butter" products in the field of instant print photography. Even getting back into the field of film photography beginning in 2014, I never once considered instant photography and what may have become of it.

The result was that the field of instant photography was one confusingly grey area for me Even if I'd stumble across an internet thread of news snippet on the field of instant photography, I never knew the breadth of what such news entailed.  One such snippet of news involved the discontinuance of Fuji Peel Apart Instant film FP-100C, and was met with significant dismay from the film photographic community.  As I'd never used such film, I had no idea of what the relevance of its discontinuance entailed.

Reading the articles about its discontinuance, and seeing its packaging as a Fuji "professional" product, my first thought was that it was used in medium and large format cameras with special "Polaroid" backs. or for older ID cameras, but not in any product that was in my typical sub-$20 price range.  Though I could feel empathy towards other film photographers losing a product, I'd never thought it would be a product that I'd have purchased.

But here I was picking up a Craigslist lot, consisting of a pair of Polaroid cameras: the "Big Swinger" and this camera: The Colorpack II.


Looking something like an oversized Instamatic, the Colorpack II is a sizable camera rife with the feel of the late 1960's and early 1970's.  The "kickstand" used for posing this camera is actually a diffuser for flash bulbs. 

While the rather awkwardly named "Big Swinger" did not use a currently available film, the Colorpack II uses the FP-100C that I'd presumed was simply a "professional" product.  Once I discovered this, I began to look forward to using the Polaroid more than the other cameras that were far more within my comfort zone.  And with this realization, my interest in cameras using this endangered film began to grow.  But more on that later.


For now though, I had come into the possession of this camera and was curious of what it was capable of.  In my overdue research, I came to discover that the Colorpack II was hardly on the short list of desirable cameras in the Polaroid line up.  In fact, it was a very mass marketed budget model when it debuted in 1969.  Given this, I expected little from this thrifty model in the Polaroid lineup, but decided I was going to push this camera to whatever limits it might have. 

The "Control Panel" on the Polaroid consists of a switch to adjust between film speeds of 75 and 3000, a focusing dial, and a knob to adjust exposure to lengthen or shorten exposure to lighten or darken the print.

Despite being a "budget" model, the Colorpack did offer a greater level of control than I'd initially expected, particularly with its rotating front lens element with a surprisingly "precisionate" focusing ring for a wide range of distances from 3 feet to infinity.  Otherwise, the Colorpack has a fixed aperture lens and an automatic exposure system, with a rather rudimentary dial to fine tune exposures. 

The Colorpack II is a particularly large camera, with a rigid body made entirely out of plastic with limited metal fittings.  It is a camera that doesn't tend to travel well with other photographic company, at least not for photo walks.  It fills up the vast majority of my few photo bags with room for little else.  My expectation is that this camera would see use for a single pack of film, and then be retired to the shelf. 

What intimidated me the most about the Polaroid was properly loading the film, but with a little help from videos, I quickly figured it out.  Note the batteries concealed within the film chamber.  The Colorpack II has the advantage over some of the more "desirable" Polaroid pack film models in taking common AA batteries.  

I actually watched Youtube videos on loading and using Polaroid pack film cameras, as I didn't want to mess this up.  This wasn't as hard as I had made it out to be.  I was now ready to fire away and see just what this camera was capable of.  And I was greatly looking forward to it. 

Using a Polaroid pack film camera is an experience pretty distinct from other film cameras. Yes, there is the typical expectations that you'll focus and compose, letting the camera determine exposure based upon the fixed aperture, but then there are the aspects that make this experience unique.  Pulling the film from the camera and waiting a few minutes to let it make the transfer to the paper adds a thrilling element that seems missing from traditional film photography.


Still, nothing quite prepared me for what I experienced after unveiling my very first instant photography print, complete with a perfect white framed border, taken while out with a few friends at work on a lunch time ramble...


I focused this image at about 6 feet and fired away.  My expectations from this "cheap" plastic camera using "Polaroid" film was to get a lo-fi type result that showed some vague resemblance of the scene that I had just snapped, but instead I was treated to a well rendered print that had a surprising amount of sharpness, perfect focus, and very vivid color.  It may sound cliche to say that "I was hooked," but it is more or less how I felt about this thrilling photographic diversion.

Obviously, revealing one's first photo and being enthused only leads one to want to snap more photos to see the results.  It didn't take long before I was finding interesting places to stop, and electing to fulfill my interest in trying to see the full range of what this camera was capable of.  I focused the following shot at minimum focusing distance.  While it seems I didn't quite nail the focusing spot, I was still quite pleased with the rendering, the color, and the nice blur to the background to make the foreground stand out.  I quickly realized that I was travelling down a slippery slope.


My next result would provide one of the nicest of instant prints I've yet to accomplish, though there is some magenta creeping into the sky at upper right.  Apparently, a pivotal part of the image result stems from how it was pulled from the camera, and having even coverage of the chemistry across the film.  Still, I love how well defined the foreground elements are, the nice muting of the backdrop, and the fantastic look of the water between.  


On my arrival home, I wasn't quite ready to put the new toy away, so I tried posing my eldest in a window and seeing what sort of natural light portrait I could do.  The ambient light was not quite enough to expose the image properly, while the shutter speed that resulted was still too long to really give a sharp hand held shot.  That said, this shot was an important step to realize the contrast that could result in some scenes, as well as provide a learning experience from which I could instantly adjust my tactics if needed, something not really possible with conventional film photography.


As successive days passed, I began to realize some of the allure of instant photography in that it would allow me to satiate my "need" to take some photographs and see some results, but in nicely measured doses.  I could head out to the store to grab some milk, grab the Polaroid on the way out, snap a photo on the way, complete my errand, and head home with a photo ready to be peeled.  Meanwhile, I could gradually learn the strengths and weaknesses of both the camera and film and adjust to these PRIOR to completing my first "roll" of film.  For example, this shot below (taken on the very errand detailed above) showed me that the Colorpack II was a bit soft on landscapes taken around infinity focus, as well as showed the contrast that can result in some settings.  


Still, I tried a few more shots at moderate focusing distance while passing through Dickeyville a couple of days later, but didn't quite get the same good composition that led me to liking the wetlands shot taken a bit earlier.  My focal point was to be the wooden post about 2/3 of the way over to the right, but it is not a strong enough focal element to carry a scene.  


In this way, I began to learn that shooting instant shots, while quite quick in nature, should not be a forced thing, but one that is best accomplished when taking one's time.  Given that the cost per shot is about $2.50, it is a lesson that is pretty readily reinforced each time you pull a sub-par shot from the depths of your Polaroid.  That all said, I hadn't quite learned this lesson as I reached my next photo stop in historic Franklintown.  I was so eager to see a result that improved upon my previous take that I hastily snapped a scene that really didn't flow well.  I could fault this on having my two kids in the car, and this being the only scene which offered a safe place to pull off and remain by the car as I snapped it, but I really didn't get anything new or interesting from this photo.  


I strove that I was going to do better with my final shot in the pack, electing to stop at a favorite setting of mine, focusing to a nearer distance, snapping the shot when the variable clouds had lightly concealed the sun to diminish excessive contrast, and trying to use the elements in the scene effectively to create a nice composition.  My last shot seems to do this well, though I have a bit of an issue with how well I pulled out the image from the camera, as can be seen at upper right.  


My experiences with the Colorpack II were quite a breath of fresh air for me photographically.  It was a great thing to be able to see each shot shortly after it was taken, and to make adjustments from there for future shots.  Each "peel" of a print image from its original film "negative" never ceased to amaze me.  I still have much to learn regarding the field of instant photography, as well as a few creative exercises that I want to try using the medium, so it goes without saying that my "one 'roll' of experiments" is certainly not my last. I look forward to doing more with the medium as long as it is feasible given the recent loss of the FP-100C film.

I you are looking for something to refresh your photographic enthusiasm, a deviation into the world of Polaroid pack film photography may be just the thing.  Cameras like the Colorpack II and its more desirable siblings can routinely be snapped up for less than the cost of a pack of film, so investment is minimal.  If you feel daunted, this site helps to decode a lot of the tangle that is the world of Polaroid photography over the past decade, and helps discern the features of the many variations that exist within the 100-400 series Polaroid models that use this pack film.

I'd also suggest that if you are contemplating this avenue, that time is of the essence. Supplies of pack film are finite and diminishing.  The train is leaving the station.  Grab hold of the genre while you still can!